
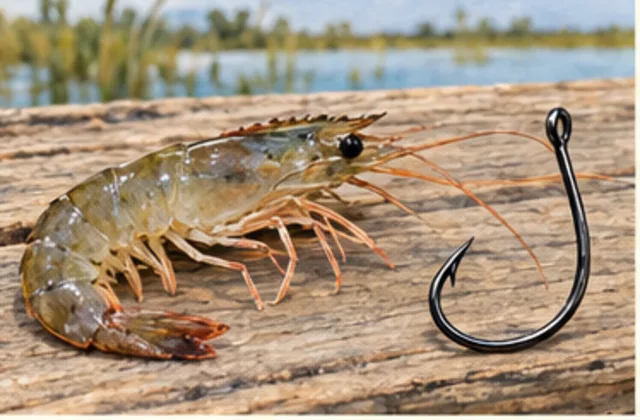
A live shrimp is a small animal used as natural bait. It can move on the hook, so the aim is to attach it without unnecessarily damaging it or preventing that movement.
Prepare the holding container, bait net and rig—the hook, line and other fishing parts—before taking a shrimp out. Ask for one complete demonstration: select a shrimp, identify the intended shell region, place the hook, check fit and movement, then use and retrieve the rig. Keep unused shrimp in their holding water while you work with one.
Recognize the parts before reaching for the hook
A shrimp has a hard head covering, eyes, a pointed projection sometimes called the horn, and a segmented tail. Soft internal tissue is visible through parts of the head.
The head isn't solid shell all the way through. A placement in a suitable firm shell area is different from pushing the hook through its center.
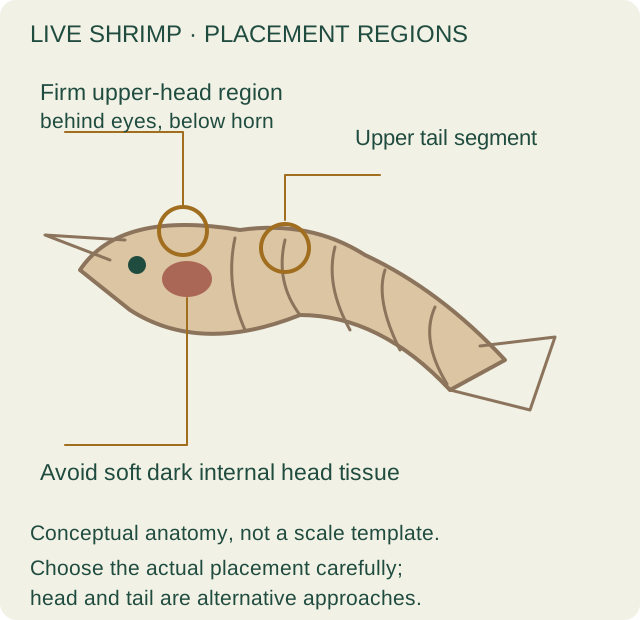 Open the full-size illustration →
Compare those regions on the drawing with the shrimp you'll use. Ask the bait supplier or crew to identify the firm shell area and the soft internal tissue before you place the hook. The drawing shows regions, not a measured piercing point for every shrimp size or shell condition. Point out the region to the instructor before attempting placement; don't turn a spot on the illustration into a fixed distance or a point to find by repeated punctures.
Understand the two placement options
One approach uses the firm upper-head area behind the eyes and below the horn, avoiding the dark, soft internal area. This leaves the tail free to move but needs careful placement.
Another uses an upper tail segment. The retained historical Sea Grant manual describes this as an alternative for shrimp with softer heads. Its placement information is background here; use current sources for any rules or access information.
Choose one placement with the supplier or instructor for the shrimp and hook in front of you. Watch where the point enters and exits, then compare the shrimp's movement afterward with its condition before placement. Keep one placement for that demonstration rather than try both on the same shrimp to compare them. If you can't identify the intended shell area, have them bait that hook and show you again rather than making several trial punctures.
Match the hook to the bait
The hook should fit the shrimp and the method without overwhelming the bait. Numbering varies between hook designs, so a size copied from a photograph isn't enough.
The point is the sharp tip; the shank is the straighter section below the hook's attachment eye. The gap is the space between point and shank. After placing the shrimp, check that it hasn't folded across that opening, wrapped around the line or had its tail pinned so it can't move as intended. Have the instructor check the actual placement and fit, not just the packet's size number. Resolve a visible fit or tangle problem with help before casting.
If using a guide's setup, ask what response the hook needs when a fish bites. A circle hook and a J hook aren't necessarily used with the same rod movement. The hook-shape lesson separates identification, bait fit and the demonstrated bite response; none of those checks substitutes for another.
Begin with a short, controlled use
Under a cork, the shrimp hangs below a visible float on a leader, a separate piece of line. The cork-rig page explains the assembly; the technique page explains working it.
Casting means using the rod to send the rig out. Begin with a short, smooth cast, following the crew's direction on a boat. Let the shrimp settle below the cork and watch the float rather than repeatedly pulling the arrangement through the water. Confirm the taught bite response and how to pause or hand over if you are unsure before making that attempt.
When you retrieve, you wind it back with the reel. Check whether the shrimp is still attached, moving, free of plants and clear of the leader. A cork moving on the surface doesn't answer those questions about the bait below it. Compare the returned bait and rig with the pre-cast check. If the leader is wrapped or the shrimp carries debris, deal with that observed problem before changing placement, leader length and casting action together.
Notice which problem you're trying to fix
- Shrimp are weak in the container: check holding conditions and handling. Hook placement hasn't happened yet.
- A shrimp quickly becomes unresponsive after hooking: review the placement with the instructor, as well as its condition beforehand.
- The hook or leader comes back tangled: retrieve and fix the arrangement before another cast.
- The bait returns with grass or debris: check the path and how far the leader reaches below the cork. It may be carrying the hook into plants or the bottom. Use the assembly lesson to review leader length and connections before the next attempt.
Keep unused shrimp in the appropriate holding system and handle only the bait you're using. The bait-care page explains that part of the job.
For an illustrative lesson note, distinguish condition in the container, placement and movement before casting, and condition on return. A change after hooking leaves placement and prior holding condition to review; it doesn't by itself prove the cause. Ask the instructor to identify one correction and demonstrate it, rather than turn repeated trial placements into the lesson.
Use the same sequence each time: ready the rig, take one shrimp, identify the region, check placement and movement, make the instructed short cast, then inspect the bait and connections on return.