
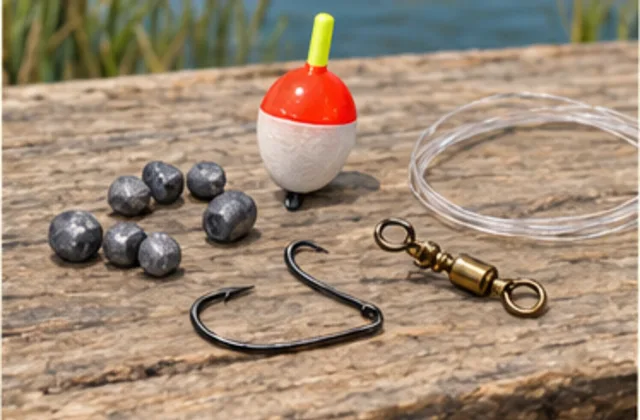
Freshwater means water with little salt, such as a lake or river. A rig is the arrangement of hook, line and any float, weight or other parts at the fishing end.
Bait is something such as a worm on a hook; a lure is artificial. The arrangements below put them in different positions and give you different jobs with the rod and reel. Compare where the hook sits relative to the weight or float, which parts move and what you watch or control. Choose one arrangement to learn through assembly, use and return rather than buying all five.
A float rig gives you something to watch
A float, also called a cork or bobber, sits on the surface with a baited hook or suitable small jig below it. A jig combines a weighted head and hook.
In a fixed-float arrangement, the float stays at a chosen point on the line. Below it are the hook and any small weight needed to help the bait settle. Moving the float toward the hook shortens the line below it; moving it away lengthens it.
Casting means using the rod to send the line out. Make a short cast into clear water, let the setup settle and watch the float. If the hook keeps catching on the bottom, bring it back and check it, then shorten the line below the float for the next attempt. If it dips or moves suddenly, it may be a bite, but flowing water or a snag—a hook caught on an object—can move it too.
A slip float slides along the line. A stop farther up the line limits how far it can slide when the bait pulls line through it. You move that stop to change the allowed distance to the hook; you don't adjust it simply by clipping the float at a different place. Follow the chosen float's layout for the stop and any bead, weight and other parts.
The distance below a float isn't always the exact depth of the hook. Moving water can pull the line sideways.
Read the actual float type back before adjusting it: a fixed float changes position on the line; a slip float uses its stop to limit travel. After a return, check the bait or lure, tangles and attachment points before changing the depth arrangement. A sudden dip is a reason to use the taught bite response, not proof that the float was set at the intended depth.
A direct jig lets you work the lure yourself
You can tie a suitable jig directly to the line or leader without a float. A leader is a separate section near the fishing end.
After casting, a weighted jig can sink before you start bringing it back. That return is the retrieve. Turning the reel handle steadily moves it back; a pause gives it time to sink again. The jig and the fishing method determine whether you use a steady movement, small lifts or pauses.
Start with a short cast where you can follow the line. If the hook comes back with plants on it, check the lure and try a clearer path rather than assuming you need a different color.
Learn what the jig is doing at short range first. A fixed countdown doesn't tell you the depth of every lure in every water.
A Texas rig places the hook in a soft lure
A Texas rig uses a hook fitted through a soft-plastic lure, often with a sliding, bullet-shaped weight ahead of it. The hook point can be positioned to reduce catching on plants or branches.
The weight can slide along the line above the hook. The hook must fit the soft lure so the body sits as intended rather than bunching up or twisting. Check that fit before fishing with it and again on return. Ask the instructor to show the intended hook position and body alignment on the actual components. If the body twists or bunches after use, address that fit before changing weight, color and movement together.
A tucked hook point can reduce catching on plants, but the line or lure can still get stuck. Learn the particular hook-and-lure assembly in clear space first; don't treat the name ‘Texas rig’ as permission to cast into any tangle of branches.
A Carolina rig separates weight from hook
In a common Carolina arrangement, the main line passes through a sliding weight and connects to a swivel, with a leader and hook beyond it. A swivel is a small rotating connector; a bead may sit between weight and swivel.
Follow the parts from the rod: main line, sliding weight, any bead in the chosen layout, swivel, leader, then hook. The weight helps take the arrangement down; the hook and bait or lure are beyond it on the leader. That spacing is the main difference from putting a weight at the hook. Read the layout and learn the connections before choosing the spacing yourself. Identify which parts slide and which joins remain fixed. A list of the right part names isn't enough if the assembled order or a connection is still unclear.
A drop-shot puts the weight below the hook
In a drop-shot arrangement, the hook is attached above a weight at the end of the line. The weight can reach the bottom while the bait or lure is held above it.
Follow the line past the hook to the weight below it. When the weight reaches the bottom, the hook is positioned above it rather than sitting at the end of the line with the weight. How high it actually fishes also depends on the line's angle and the setup.
Use a drop-shot connection suited to the hook and line, with the hook presented as that layout requires. Moving the weight below the hook in a different rig doesn't by itself make the connections or spacing correct.
For an illustrative layout comparison, trace a Carolina arrangement through weight and swivel to the leader and hook, then trace a drop-shot past its hook to the weight below. Both use hooks and weights, but their order and connections give them different jobs. Have the actual arrangement demonstrated rather than create a new one by moving a loose sinker.
Start with one arrangement you understand
Choose by what you want to learn. A float gives you a surface marker to watch; a direct jig lets you practice casting and winding a lure back. The other arrangements change the positions of weight, leader and hook. Tell a guide or shop which activity you want, then ask for one complete lesson:
- Trace the actual parts from the rod to the fishing end, naming each attachment and any sliding component.
- Check the complete casting weight against the rod and identify the reel controls for the intended method.
- Watch a demonstration of casting or lowering, settling or moving the rig, and the response for that hook.
- Repeat the instructed attempt, bring it back and inspect the bait or lure, joins and alignment.
- Make one correction at a time and repeat the affected checks after a change.
The whole-setup guide connects the rig to the rod, reel and line. Keep unknown weights, joins or controls as questions to resolve rather than assume the rig name establishes compatibility.
If tying the joins is new to you, the knot lesson explains the line ends and a first knot. The hook-and-part guide explains what each component does.
Use the retained rig reference alongside an actual demonstration. A simple, suitable setup you can use is a better start than a bag containing five rigs you can't explain.